Wednesday, December 10, 2014

A Simple Kinect Tripod Mount


I've been working on some visualization software in Processing using an Xbox Kinect Sensor, which will be used for a live video performance (in collaboration with the guys at BREAD MOTHERS) this Friday as part of Canopies album release show.  

I'll post more about this event, and my collaboration with BREAD MOTHERS and the Canopies, in the coming weeks.

In the mean time, I needed a way to mount the sensors to tripods and/or booms to capture the performance on stage, without having to awkwardly balance the kinect sensors on shoe boxes or something.


The tripod I'll be using has a standard 1/4-20 bolt which is compatible with most cameras.  


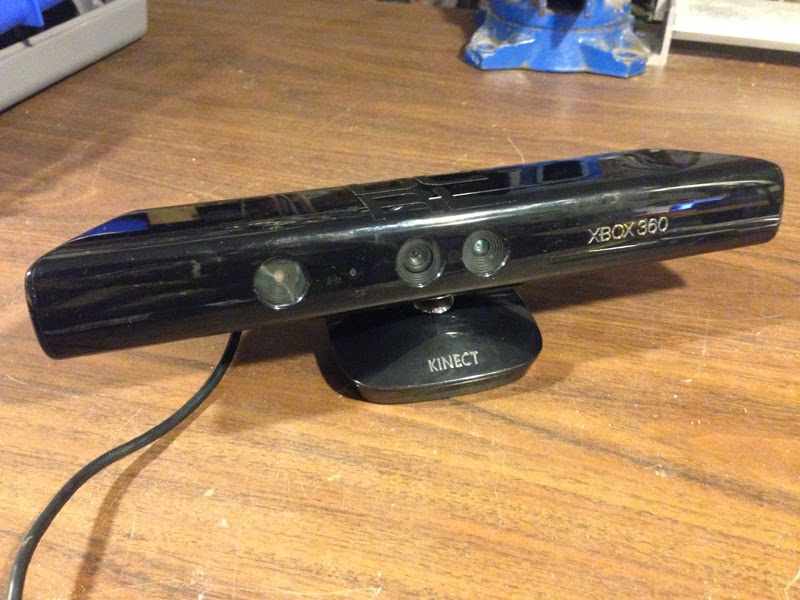
The Kinect, however, is meant to sit on a TV stand and has no mounting hardware.  I decided to change that!


I started by cutting a six-inch section of some 1.5"x0.25" aluminum strapping.


For these cuts I'm using an Aluminum-cutting blade on my compound miter saw.


I draw out a 4" box, with a 1" margin on either side.  I also drew centerlines from the four corners of the box.


I then drill five holes using a 7/32" bit.


The four corners will be for mounting the kinect to the aluminum, the center hole will be threaded to mount to the 1/4-20 tripod bolt.


Tapped the center hole with a 1/4-20 tap.


Next, I chopped the aluminum down to the 4" box I measured earlier.


Leaving me with four "notches" rather than holes.


These notches will secure zip-ties, which will hold the sensor in place.


Zip-ties were the perfect solution, as they enabled me to attach the sensor's base to the aluminum mount without having to modify the kinect or damage it in any way.


Yup.  That'll do.

Wednesday, October 29, 2014

TEDx UWMilwaukee

Things have been busy.  Too little time to blog, and certainly not enough time to make stuff.  This is what fall semester does to me... But my students are totally worth it!

Anyway, here I am talking about art, technology and useless machines - as part of UWMilwaukee's TEDx event.


Wednesday, October 15, 2014

Student "Initials Logos"

I have a handful of students in my 2D Digital Design class who are doing excellent work (most of them have no prior experience in digital media!) and I wanted to share their outstanding work.

I begin this course focusing in Illustrator - then move into Photoshop mid-semester.  One of the projects challenges students to design a logo based on their initials, and create a vector graphic.

A couple of my favorite submissions for this project include:

by Heidi T.

by Mike M.

by Amber S.

by Ty C.

by Brooke S.

by Rosaisela M.

by Joanna A.

Friday, September 26, 2014

Supercontroller 3: First look!


Supercontroller 3 is finished!  Well, aside from more debugging and a bit of tweaking to the animation of a couple elements.  But the hard work is done.  Yay!

Come see this in person at Vital Technologies, opening October 17th at MIAD.

Friday, September 19, 2014

Copper Electroplating/forming 3D Prints


My good friend and studio mate Aaron (De Land Tree) - his work is pictured above - has been doing a lot of work with electroforming copper structures, and recently helped me plate some 3D prints.  It was such a fun and interesting process that I just had to share on the blog.


For my first trial, I selected a model from a previous project.  This was printed in ABS on my Up! 3d printer.


Electroplating is a process that uses electrical current to reduce dissolved metal cations so that they form a coherent metal coating on an electrode.  This means I need to run electrical current through the piece, so here I've prepped some copper wire to serve as the cathode of the plating circuit.


In order to attach the wire, I first drilled a hole whose diameter is slightly smaller than the gauge of the copper wire.


After pressing it into the hole, friction alone holds the wire in place.


To create a conductive (technically a resistive) surface on the piece, we are using graphite powder.  This is an inexpensive material and you can find pretty easily on Amazon.


Aaron discovered a neat trick for ABS prints.  Because ABS dissolves in Acetone, we can create an acetone/graphite paint that adheres really nicely to our prints.


I added just enough Acetone to the powder so that it has a watery consistency.


Using a watercolor brush, I slowly built up a couple layers of our "paint" solution.  The solution goes on easily and if done carefully, does not disrupt the details of the print.


We then connect the cathode wire to the ground terminal of a rectifier (a switching power supply) and the anode is connected to a chunk of copper.


Both will be submerged into a solution of copper sulfate, which Aaron purchased from Rio Grande.


Here's a diagram illustrating the setup.


Aaron recommends adding a few drops of brightener, also purchased from Rio Grande, to the solution for a smoother plate.


Because the graphite is resistive rather than conductive, you can actually watch the copper begin to creep over the cathode form.


After about 4 hours, the print is plated in copper.  Depending on the thickness of copper plating you desire, you can leave it in for more or less time.  The initial finish is a bit dull, but that's easy to clean up.


I used a stainless steel polishing bit on a high speed rotary tool to buff the plated print.


This instantly creates a shiny finish on the form.


And here is the finished piece, printed in ABS and plated in copper.


Using an almost identical process, only replacing the copper sulfate with silver solution, and the copper anode with a silver one, we can plate a copper object in silver!


Which of course, I opted for.  Silver 3d prints?  Yes please!  Also, copper will eventually tarnish, so a silver plating will keep the object shiny and happy!


Again, the initial plate comes out a bit dull.  Rather than buffing with a rotary tool (which is a bit too aggressive for the thin silver plating) I just use some steel wool to polish the surface.


And the finial product!  Printed in ABS, electroformed in copper, and plated in silver.  Alchemy in Milwaukee!  Thanks for the help, Aaron!

UPDATE:  Aaron will be demonstrating this entire process, in much better detail and in person, at the Milwaukee Maker Faire next week!

Tuesday, September 16, 2014

Koopa Troopa vs Body Tracking


Just a fun little update: had a few extra minutes this morning and was able to get body tracking working with the Koopas.  Not flawless yet, but getting there!

Keep your eyes peeled for a special guest appearance near the end of the vid...

Monday, September 15, 2014

Updating Supercontroller

Due to my upcoming duo show with Nathaniel Stern (opening on Octboer 17 @ MIAD) I am finally updating  - and revising - Supercontroller.

I decided to speed up installation it would be best to switch from a web cam, IR lights, and openCV, to an Xbox Kinect Sensor.  I thought, while I'm updating the work, why not improve upon it?


Above are the first tests using a Kinect for body tracking in Supercontroller (with added Spiney enemy!)

I'm currently working on adding a Koopa Troopa, which is a much cooler enemy than Spiney, and makes for a slightly more complex interaction!

Next on the agenda is getting the coin/life counter working, and possibly adding another enemy.  I'm thinking something aerial...

Friday, July 11, 2014

Frankie Flood + Blog Tour


Frankie Flood contacted me today about participating in a "blog tour" - I've never heard of this before, but apparently it is a process of linking to three blogs you follow, and asking those three bloggers to do the same. It initially reminded me of the chain-letter emails popular in the late 1990's AOL era.  Since I do follow a couple of blogs pretty religiously, and constantly find myself pointing people toward them anyway, I thought it could be fun to participate.

I dont think I'm supposed to use Frankie's blog as one of the three I'm to "tag" (I probably read his more than any other) but you can at least head there to check out his post on this blog tour.

Now, let us continue the tour.

Blog #1: Bunnie Studios

http://www.bunniestudios.com/


Andrew "bunnie" Huang is an American hacker, who holds a Ph.D in electrical engineering from MIT.  He blogs primarily about open source electronics and hackery, and about his own projects ranging from re-purposing SD card micro controllers, to building electrical circuits on the fly using a series of pcb stickers he designed, to his incredible open source laptop series. 


His blog also features a regular segment titled "Name that ware" where he posts ambiguous details of circuit boards and asks his readers to attempt to identify their origin.  I rarely have any idea of the pcb's identity, but it is always fun to read replies from the savvy readers who do.


Blog #2: Anna Kaziunas France

http://blog.kaziunas.com/


Anna Kaziunas France is the Digital Fabrication Editor of Maker Media and the Dean of Students for the Fab Academy program. She blogs about everything digital fabrication, and focuses primarily on new platforms for 3D printing, desktop CNC milling, and home-brew manufacturing.  Any time I hear about an exciting new platform for making it is usually from this blog.


Blog #3: RasterWeb!

http://rasterweb.net/raster/


Pete Prodoehl, who started RasterWeb in 1997, is a Milwaukee-based artist, designer, tinkerer and all-around maker.  I met Pete after his robot beat my robot in a competition last summer.  He's an active member at the Milwaukee Makerspace where he serves as communications director.  I love his blog because he posts about things that span the entire spectrum of what I'm interested in, including art, design, digital fabrication, creative coding, open source hardware and a bunch more.  He is also great about posting walk-throughs of his experiments, which makes for an amazing learning opportunity for anyone in this vocation. 

Thanks for reading, and happy touring!!