Saturday, January 25, 2014

New agitator design.


This is my old agitator.  When I first started etching my own PCBs, I cobbled this thing together in about an hour.  While it got the job done, it was ugly, bulky, required a dedicated micro controller, and did not accommodate different sized containers.  I thought it was time for an upgrade...


I drew this thing up last summer.  The idea here was to mechanize the oscillation, to cut out the need for a micro controller and servo.  Also, I wanted to design the frame to be adjustable, to accommodate different container shapes and sizes.  This design would also allow anyone to build one for themselves without having to own the exact same glass container I use.


The brackets for the frame, and several other key components, can be 3D printed.  I'll be publishing the designs on thingiverse in the near future.


The most complex part of the design in the oscillator.  This will convert the radial motion from a 12v DC gear motor, to an up and down sine wave oscillation. 


I designed the 3d-printed bearing block to hold one 608 bearing, and two 8mm linear bearings (the former can be salvaged from old roller skates, both can be ordered from most 3d printer part suppliers.)


The "lever" for the oscillator can be made from a small chunk of aluminum.  I cut a bit off a scrap from an old project.


One hold should be drilled in the face of the aluminum block to accomodate the diameter of the motor shaft you're using.  Mine was about 5mm.  Another hole will be threaded with a 5/16" tap, so should be drilled to about 9/32".  A third hole should be drilled in the side of the block for a set screw for the motor shaft.


Tapping the 5/16" hole.


Tapping the set screw hole (I went with a 6-32 tap for this.)


Pictured above: the newly machined lever attached the the motor shaft.  To mount the motor I just used a steel bracket from a local hardware store.


With the oscillator finished, it was time to cut a bunch of steel rods.  8mm rods are ideal... I had some left over from 3D printer projects.  But in a pinch you can get away with 5/16" rods for this design... I ended up using a couple of these as well because I can buy them locally.


Above: first test of the oscillating mechanism.  Was a bit too dramatic for the application of agitating chemicals, so I ended up moving the 5/16th hole closer to the motor shaft hole.


The last thing to fabricate was the rubber "grippers" for holding the glass container steady in the agitator.  I used some scrap rubber tubing with foam rubber super glued around them.


The finished frame, with rubber grippers attached.


As you can see, the middle bar of the frame can be slid from side to side to accommodate various containers.


First footage of the finished agitator.  I wired a toggle switch to easily start and stop the machine.

I'll be using this quite a bit in the near future for a new project, so look forward to more images and footage of this guy in action!


Saturday, January 18, 2014

PCB fab - Toner transfer method


I finally perfected the toner transfer method for fabbing my own printed circuit boards.  David Kelley of Ideo says "Fail often to succeed sooner."  Let's just say that the video above was not my first attempt at this process...


I recently picked up a used HP laserjet 5000. The main paper tray feed is broken, but the single feed tray works fine.  This is perfect for printing toner transfers!  You can find them on amazon for around $200, here.


With the printer set to use maximum toner density, I printed a sheet of fabkit arduino boards (plans from MIT here) for practice using this method of making an etch resist for a pcb.  I use toner transfer paper by Pulsar, here.


In the past I've attempted to use a clothes iron to apply heat to the transfer paper, but decided to pick up a cheap laminator to hopefully simplify the process.  This one works like a charm, as long as I run the board through several times.


I found that folding a bit of the paper over the edge of the copper clad board helps hold it in place as it goes through the laminator.


As SOON as the board runs through the laminator, toss it in some room temperature water (as shown in the video at the beginning of this post.)  In the past I've waited too long before putting it in the water, and it doesn't release properly.


Next I add a layer of green TRF foil.  This will adhere to the transferred toner and strengthen the resist against the acid.  Again, I fold a bit over the edge of the board.


And run that through the laminator...


I peeled the TRF foil away, and voilĂ ! The resist is complete.  Time to etch...


For that, I do what printmakers call the "Edinburgh Etch."  A mixture of ferric chloride, citric acid, and water will etch the unprotected copper away from my board.


I add some adhesive-backed craft foam so the board will float in the acid...


Normally I use an agitator to keep the acid moving around, but I'm currently in the process of upgrading mine.  In that case, I make sure to have the copper side of the board facing down, so that the copper will fall away from the board as it etches.


The board after the etch...


Resist removed with acetone, board trimmed on my bandsaw & beltsander.


My arduino SMD components...


And after (painfully) soldering the tiny components, the board is finished!  Next step would be flashing the atmega chip, but I'll save that for another post.


Thursday, January 2, 2014

Pung Remake


For an upcoming show at the Madison Public Library Gallery, I decided to remake my interactive piece Pung (see old versions here and here.)  Versions 0.3 and earlier required a hidden laptop to run, so I decided V 0.4 would run solely on an arduino micro controller. 


The new Pung utilizes Wayne and Layne's open-source Video Game Shield along with the TVout library for Arduino.


For audio input/interaction, I'm using two electret microphones and breakout boards from Adafruit, here


 The first test-footage of Pung V 0.4:


Still some debugging to do, but the software is working well enough to show in Madison next week.  The next step is installing the new system inside of the old Pung console-case.

If anyone is interested, I will most likely do a build detail on this project in the future.


Tuesday, December 31, 2013

Holiday Break Makes


For the holidays I have roughly four weeks off from teaching.  That, coupled with a holiday season of gift-giving, has given me the opportunity to make tons of smaller-scale projects in the studio.  I thought I'd post an overview of some of the things I've been making... I'll try to come back later to detail some of the more interesting projects.


The first holiday gift I worked on was this "Heart Milwaukee" wall piece.  Louisa and I designed this for her brother and his wife. I created a mask by laser cutting masking tape, then sprayed the exposed wood with an acrylic clear coat.  I removed the tape and stained the entire piece.  The clear coat acted as a stain resist, giving contrasting values in the wood grain.  Notice the shape of Milwaukee County....


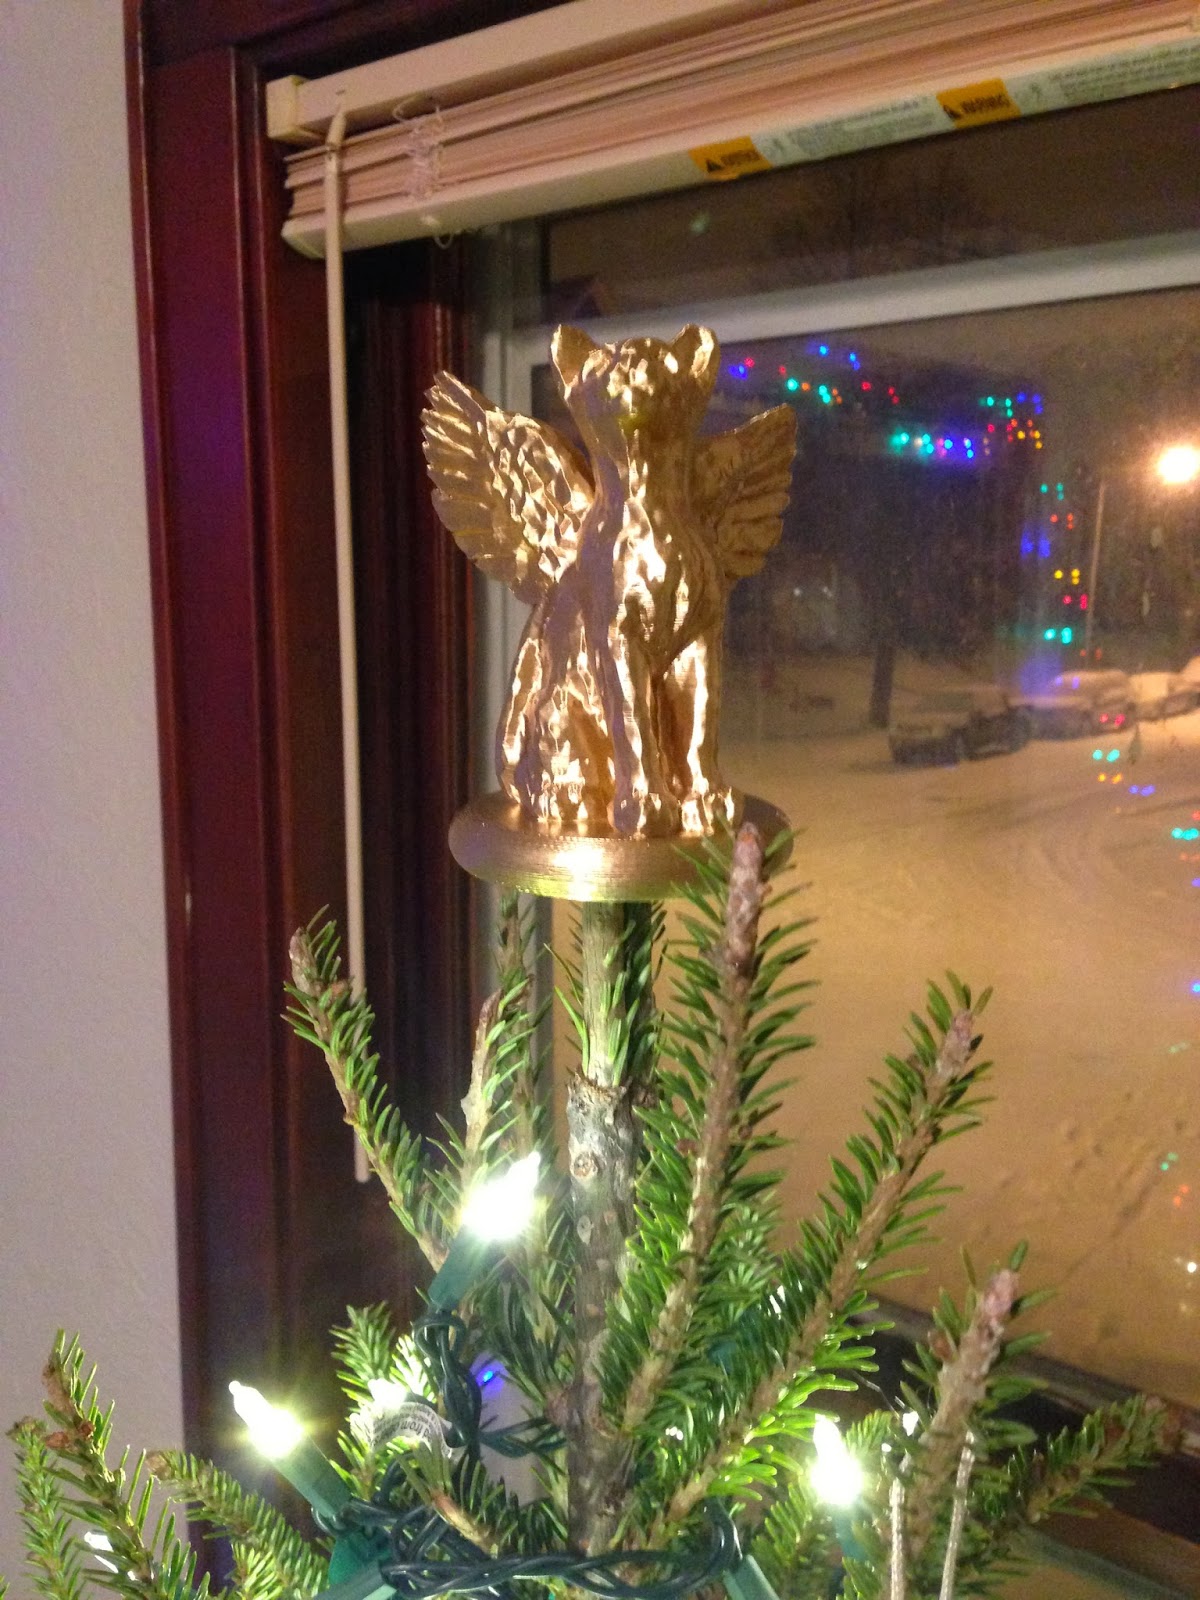
My next Holiday Project was designing this angel cat tree-topper.  When we got our tree, Louisa jokingly said "We need a cat for the top."  Eight hours later we had one!  More details on thingiverse, here.


Louisa's sister in-law has a chocolate lab, Dixie, and is obsessed with labs in general. I decided what she needed was some lab-themed bling.  Made from laser cut acrylic, brass chain, and acrylic jewels.


Though intended for a human, it looks pretty good on Dixie, too.


I also had fun making custom boxes for gifts!


On the topic of boxes, my next project was creating a custom case for an iphone-camera lens kit I put together for Louisa.


Made from a recycled Tea Box.  I modified the dividers, added latching magnets, a handle, and foam inserts to protect the equipment!


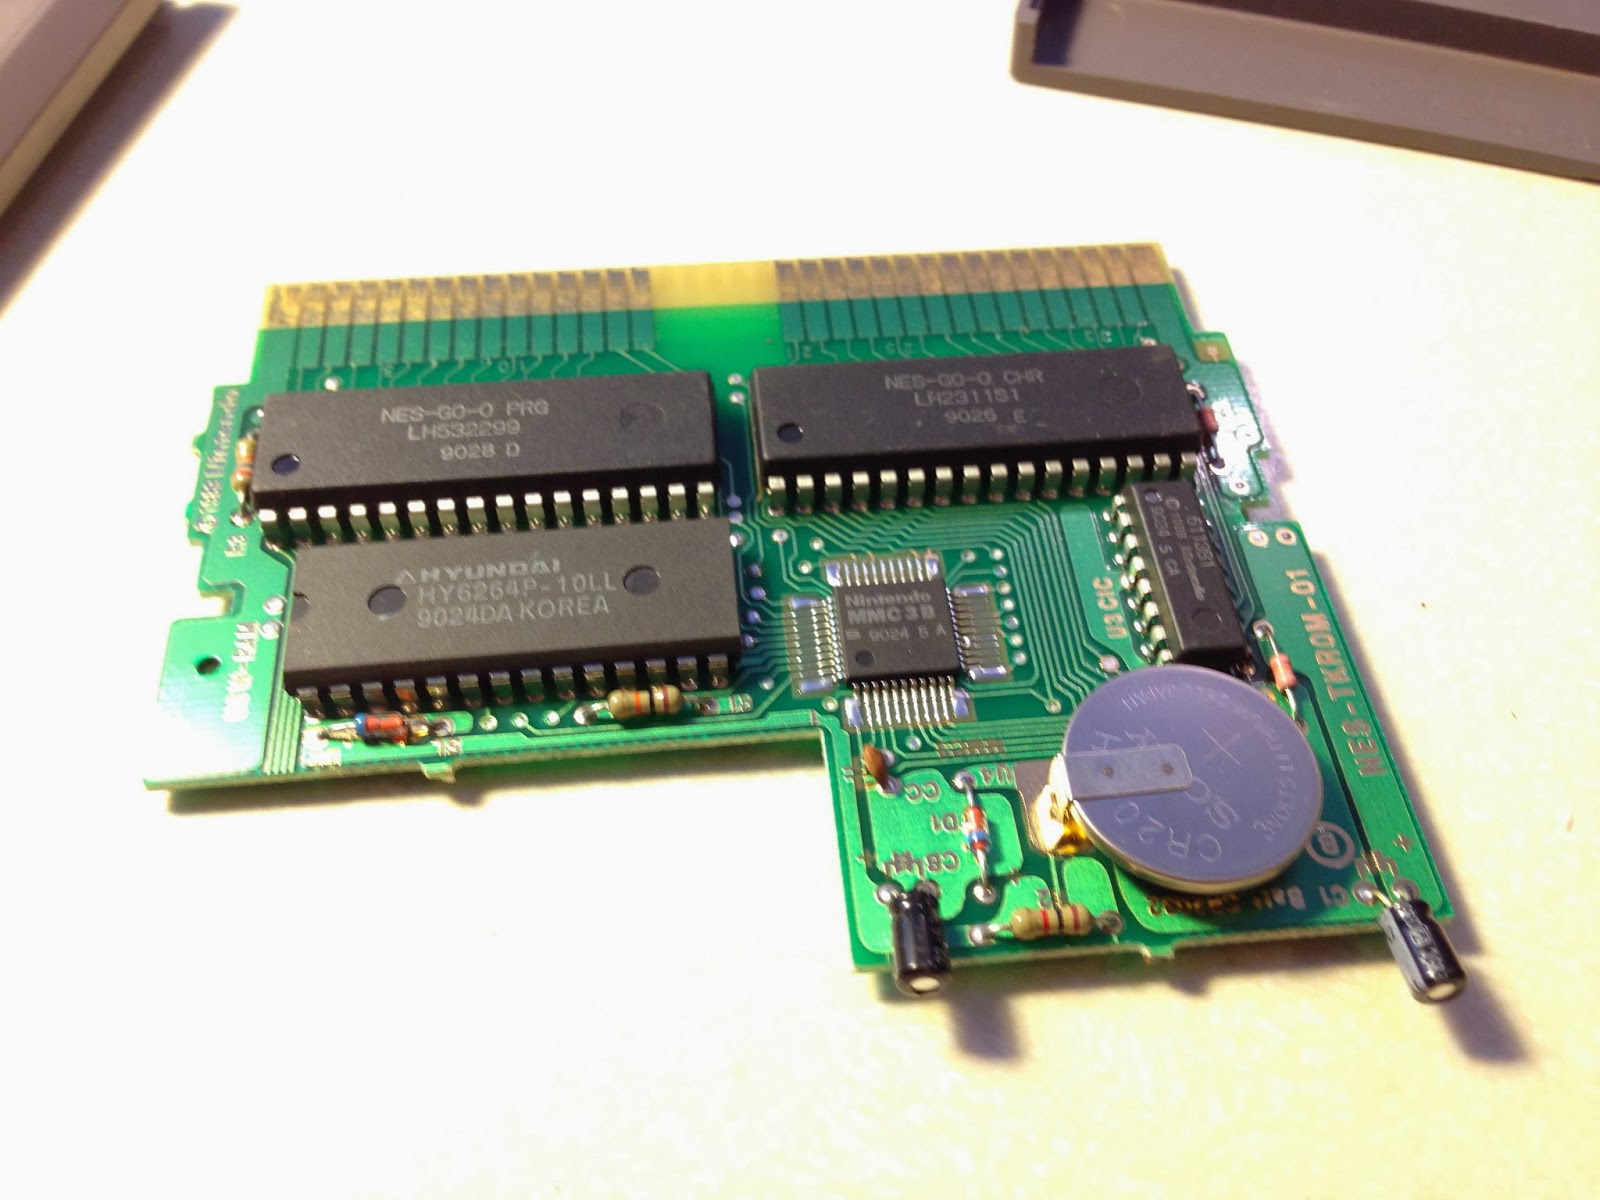
Next up: fixing a NES cart for my brother, Joe.  This cart had a dead coin cell battery, which disabled its save-game capability.  I replaced the dead battery with a fresh one.  I also added a modified battery-holder, so in 15 years Joe can replace it again!


I also created a custom chess set for my dad.  More info on thingiverse, here.


For a white elephant party gift, I created this laser-cut capacitive touch led lamp.  I used an ATTINY85 chip for capacitive sensing and LED actuation.  This was a fun project.... I'll definitely post more about this later.


A little video demo of the lamp.


Finally, I created these last-minute keepsakes to bring as gifts for a post-holiday dinner party.  I reused the same graphic from the wall-piece earlier in this post.  This was made by laser-cutting the design from 1/8" black acrylic and 1/8" plywood, then swapping the pieces. This was fun, but became quite a little puzzle to put back together.


I'll have to come back soon and post more details and process shots from some of these projects.  Until then, happy holidays, and happy new year!

Thursday, December 5, 2013

3d printed tree cats are people, too.


Woke up this morning to a nearly finished angel cat. At 5.5 inches and 11 hour print  time, this is the largest and longest print I've done so far on my Up! Printer.


Well worth the material and wait.  This came out flawlessly.


A tree-topper I can be truly proud of.


Wednesday, December 4, 2013

Cats are people, too.


Louisa asked the other day, while decorating our holiday tree, if we could put a cat on top instead of an angel (her and I share a deep passion for cats).  I couldn't resist.


This was created mostly by mashing together parts of other open-source models.  More details, as well as the STL file, can be found on Thingiverse, here.

The first print is under way right now, on my Up! Printer.  I'll post some shots when it's completed tomorrow morning.